In the beginning...
You've started the program and now you are looking at the same screen that all Sterlingware users see. I have reduced the size of the window so that it fits on this webpage better.

Z o o m I n / O u t
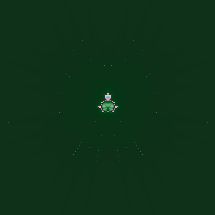
First lesson: Put the mouse cursor in the center of the fractal window (the window called "Sterling-1") over the little green and pink thing. Click once. You are now zooming-in. You zoom towards the place you click. Click two more times in the center of the green and pink thing. Most fractal programs don't allow you to zoom-in this easily. This is the image you should see after your three clicks, yours might be a little off-center if you didn't click in exactly the same place as me.

Now with the cursor in the fractal window, click the right mouse button. A menu appears. It's called the right-click menu and it should look like this:

The "Zoom In/ Out Mode" is checked. Uncheck it by clicking on it. The menu will automatically disappear. Click again in the fractal window and you are now zooming-out. You zoom away from the place you click on. Two more clicks in the middle and you should be back at the place we started from.
Now right-click again in the fractal window. We see the same menu with "Zoom In/ Out Mode" unchecked:

R e c t a n g l e M o d e
Check "Rectangle Mode" by clicking on it in the right-click menu. Now click once in the fractal window, you should get a set of "crosshairs" like on a telescopic gun site in the movies. Click and drag (click and move the mouse without releasing the mouse button) to make a rectangular outline of any size you wish. Release the mouse button and now double-click inside the rectangular outline. Your new window is the border of the old rectangular outline. This allows you to precisely frame up and select part of a fractal the same way you would crop a photograph. The rectangular frame you create will automatically shape itself to the proportions of the window size selected, which in our case is the default setting of 160 pixels X 120 pixels. ("Default Setting" is the setting you get when you don't change anything).

Click and drag again in the fractal window to make another rectangle. Now without clicking, place the cursor just over each of the little boxes on the rectangular outline. You will see little double arrows. Clicking and dragging on these will allow you to move out or in the sides of the rectangle. Place the cursor inside the rectangle and you will see a four-pointed arrow. Clicking and dragging on this will move the whole rectangle for precise positioning.
There's another way to zoom into your rectangle. Just below all the drop-down menus there is a bar of icons which looks like this:

Once you've drawn your rectangle, just click the magnifying glass icon  and you will zoom into the rectangle you've created. Also, when you go to draw another rectangle in your new image you won't have to click to get the crosshairs, your cursor will already have them if you used the magnifying glass icon for zooming. If for any reason you want to clear the rectangular outline from the screen, just click on the "Image" menu and select "Clear Rectangle".
F i l e S a v i n g
On the icon bar click on the "Save As" icon: 
You will see the standard file browsing window that is found in many programs.

If you click the downward triangle at the end of the "Save as type" box you will see that Sterlingware can save in a number of file formats.
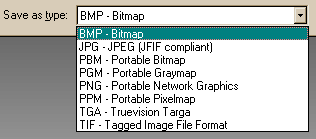
Choose your directory, type in the file name "fractal.bmp" to save as a "Bitmap" or substitute ".jpg" or ".png" for ".bmp" to save as a "JayPeg" or "Ping" and then click on the "Save" button. You have just started your Sterlingware fractal gallery. (See "Everything Else" for more detailed file saving options).
R e s e t C o o r d i n a t e s
Next, click on the icon that looks like a pencil eraser rubbing out the letter "a".
This is the "Reset Coordinates" icon and will bring you back to the original view you had in your fractal window before you did any zooming. Now right-click in the fractal window and make sure that "Zoom In/ Out Mode" is the only item checked on the right-click menu. Click on the fractal to zoom-in about ten times and then click the "Reset Coordinates" icon. This will always bring you back to your starting point.
X Y S i z e
If you want to make a larger fractal image than the small, default 160 X 120 pixels, then just click on the telescoping square icon  called "XY Size". You will see a very simple dialog box:

If you click on the arrows you will raise the numbers by 10's. If you highlight the numbers by clicking and dragging on it, you will be able to type in a completely different number. Lets try Width 215, Height 215 (215x215). Click on the "Apply" word to apply the changes. You should see an image like this:
In your new 215 x 215 pixel fractal zoom-in a few times on the green and pink fractal (not on an empty black area). Now click the "XY Size" icon again. Highlight the numbers by clicking and dragging and change them back to 160 x 120 and click on "Apply". As you can see, changing the size of the fractal window doesn't reset the fractal or change it in any way. When you save your fractal image, it will be the size of whatever the window was set to when you saved it.
You have now mastered all the basic functions of Sterlingware. There is nothing more to do now than to learn how to make different fractals. As you will see in the next tutorial, the program has been designed to make this very easy.
Generating Fractals